Real HTTPS in Local Network: Let's Encrypt and DNS Validation via GoDaddy API

🇺🇦 Читати цю статтю в оригіналі українською
We have already learned how to assign clean names to our local services using AdGuard Home and Nginx Proxy Manager. However, opening addresses like http://grafana.home still displays an unpleasant “Not Secure” warning in the browser address bar.
For secure transmission of passwords and data inside the home network, we need HTTPS with a green padlock.
Since Let’s Encrypt does not issue certificates for made-up local domains (like .home), we will use our real public domain — for example, home.myhomelab.org — and issue a free certificate for it using DNS validation via the GoDaddy registrar API.
Why DNS Validation (DNS-01)?
Normally, Let’s Encrypt verifies domain ownership (HTTP-01 challenge) by attempting to access your server from the internet. Since our servers are behind NAT inside a local network, Let’s Encrypt cannot connect to them from the outside.
With DNS validation, verification happens differently:
- Nginx Proxy Manager (NPM) makes a request to Let’s Encrypt.
- Let’s Encrypt asks to create a special TXT record in your domain’s DNS.
- NPM, via the registrar’s official API (GoDaddy in our case), automatically creates this record.
- Let’s Encrypt verifies its presence in the global DNS and issues a Wildcard certificate (
*.home.myhomelab.org). - The temporary record is automatically deleted, and the certificate is renewed for free every 3 months.
Step 1. Local Redirect in AdGuard Home
We need to configure our home DNS so that addresses like *.home.myhomelab.org lead directly to our reverse proxy:
- Go to AdGuard Home -> Filters -> DNS Rewrites.
- Create a rule:
- Domain:
*.home.myhomelab.org - IP Address: The IP of your proxy server (e.g.,
192.168.50.125).
- Domain:
Step 2. Obtaining API Keys in GoDaddy
To automate record creation, let’s get API credentials:
- Go to the developer portal: developer.godaddy.com/keys.
- Click Create New API Key.
- Name it (e.g.,
NPM-SSL) and choose the environment type: Production. - Save the generated Key and Secret (the secret is shown only once!).
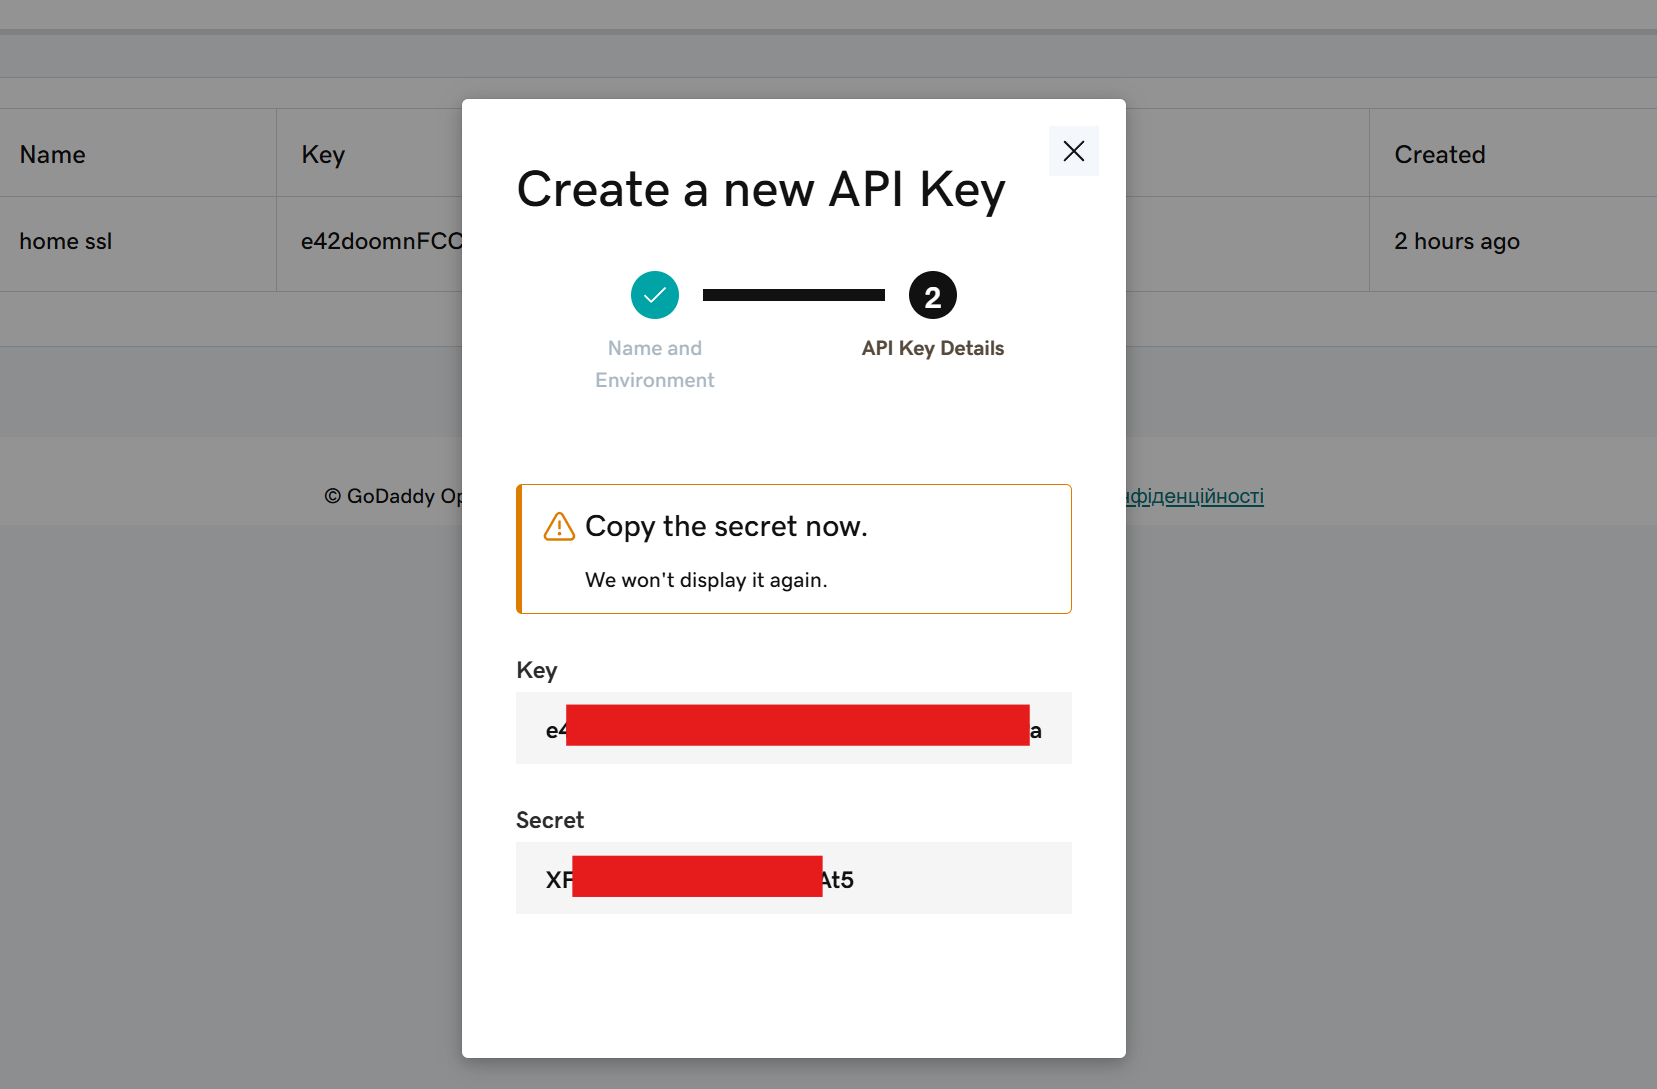 Fig. 1. Creating API Keys in GoDaddy Developer Portal
Step 3. Requesting the Certificate in NPM
- Open Nginx Proxy Manager -> SSL Certificates -> Add SSL Certificate -> Let’s Encrypt.
- Enter the domain:
*.home.myhomelab.org(make sure to press Enter to convert the text into a tag). - Toggle Use a DNS Challenge and choose GoDaddy as the DNS provider.
- Paste your generated API credentials instead of the default placeholders:
1
2
dns_godaddy_api_key = YOUR_GODADDY_KEY
dns_godaddy_api_secret = YOUR_GODADDY_SECRET
- Click Save.
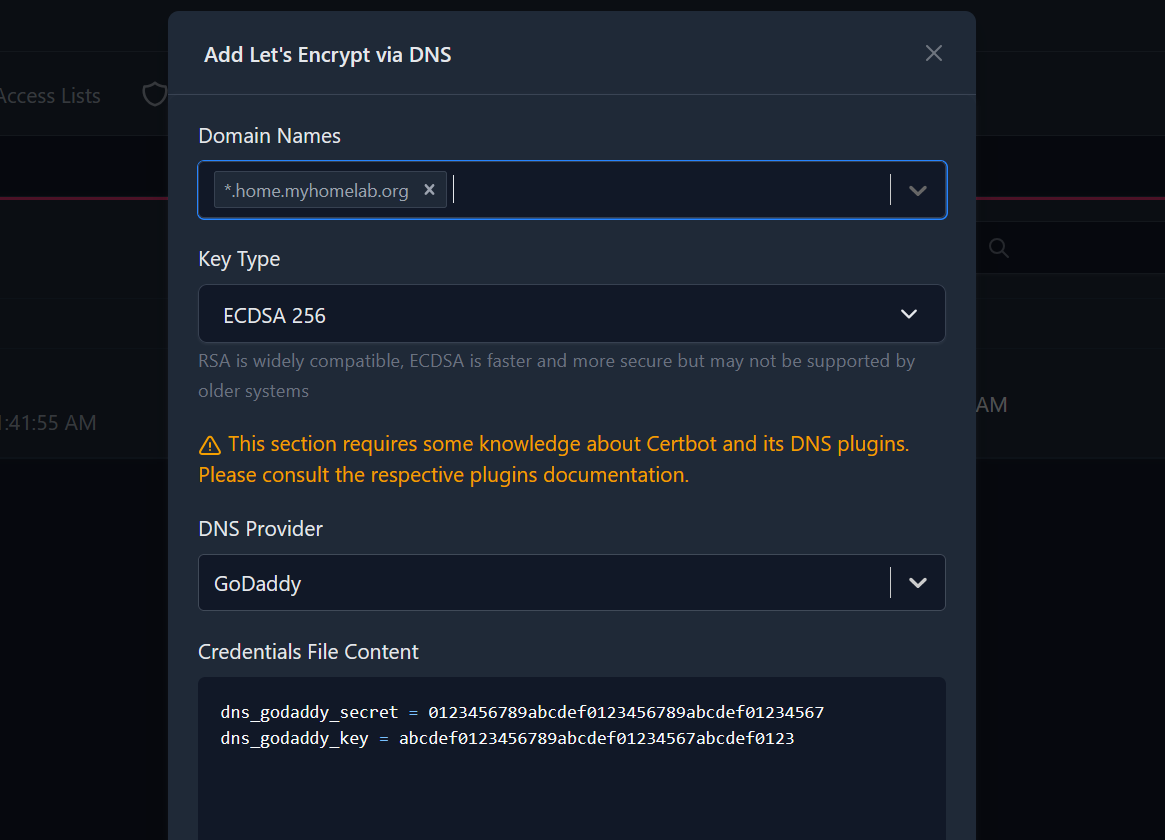 Fig. 2. Configuring Let’s Encrypt DNS Validation in NPM
Step 4. Assigning the Certificate to Services
Now open the Hosts -> Proxy Hosts tab, edit your proxy host (e.g., change the domain to grafana.home.myhomelab.org), and on the SSL tab, select the issued *.home.myhomelab.org certificate. Toggle Force SSL and save.
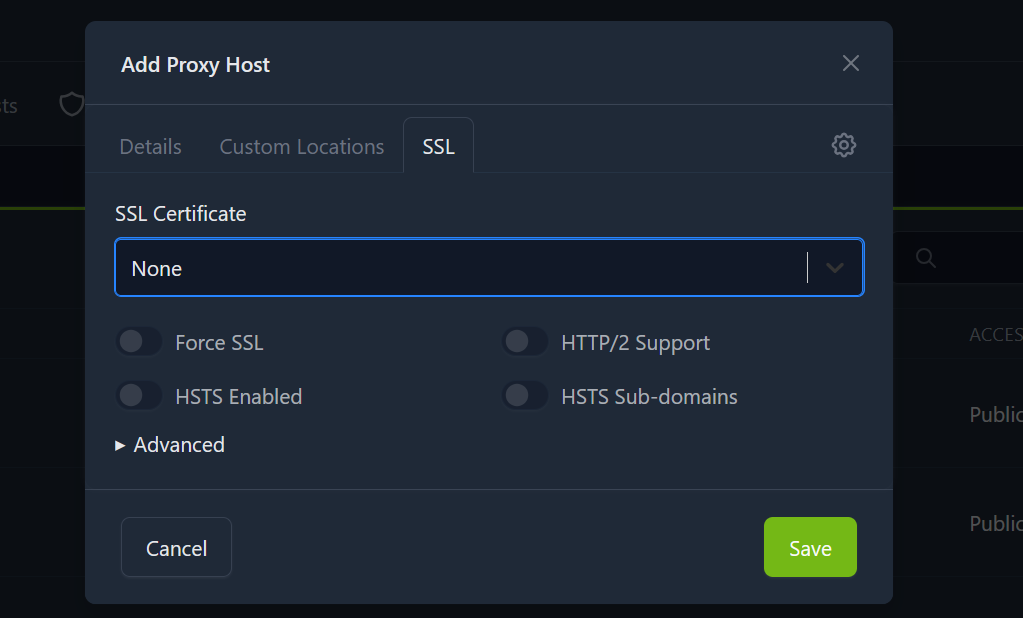 Fig. 3. Activating SSL Encryption for a Proxy Host
Step 5. Quick Redirect via Short Name
Since the certificate is issued only for *.home.myhomelab.org, attempting to access https://grafana.home directly will cause the browser to trigger a security warning.
To maintain the convenience of the short name:
- In NPM, go to Redirection Hosts -> Add Redirection Host.
- Enter Domain:
grafana.home. - Specify Forward Domain:
https://grafana.home.myhomelab.org.
Now, when you type the super-short address grafana.home, the proxy automatically and silently redirects you to the fully secure https://grafana.home.myhomelab.org with a green padlock!